
One of the primary ways I still mother Xavier is through creating things. Whether I write, sew or scrapbook, I feel solace when I set aside quiet time and make beautiful things in his memory. It is a way to connect and reflect and most of all, continue to make room in my life for him.
I wanted to share how I made this text butterfly so that others might be able to create something similar for their loved ones gone too soon.

I used Pages on a Mac, and my instructions will be specific to that program, with an assumption that the reader is relatively well acquainted with the program. This blog post explains how you can do something similar in Word – http://irishitalianblessings.com/2013/02/add-text-to-shapes-in-microsoft-word.html
So here, goes:
- Firstly, find an image that has a clear outline that speaks to you – perhaps wings, a heart, a flower, etc.
- Save that image.
- Create a new pages document and insert the saved image.

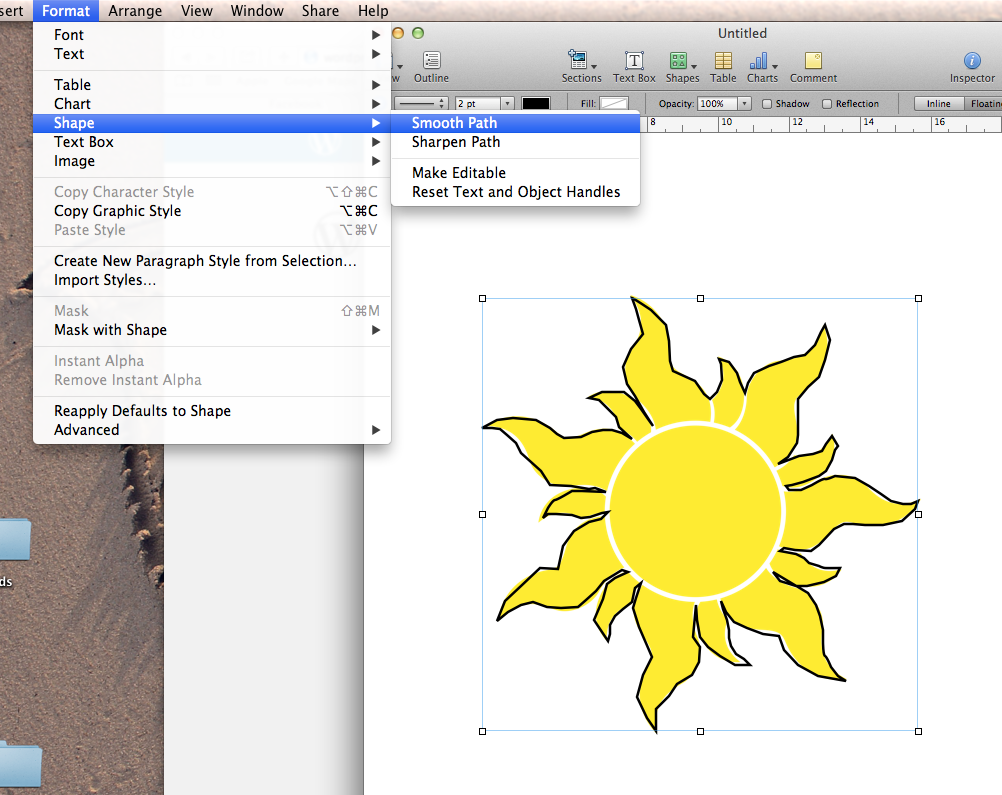
- Choose the free draw tool from the shapes menu. Trace around the edges of the image. To soften the lines use Format > Shape > Smooth Paths.


- Select the image and delete it. You should be left with the shape you have traced

- Find the lyrics, verse or prose you want to form the text part of the image. Copy them to the clipboard and then paste into a new pages document.

- Find all the paragraph markers and replace with a space using the find tool. Copy the resulting text.

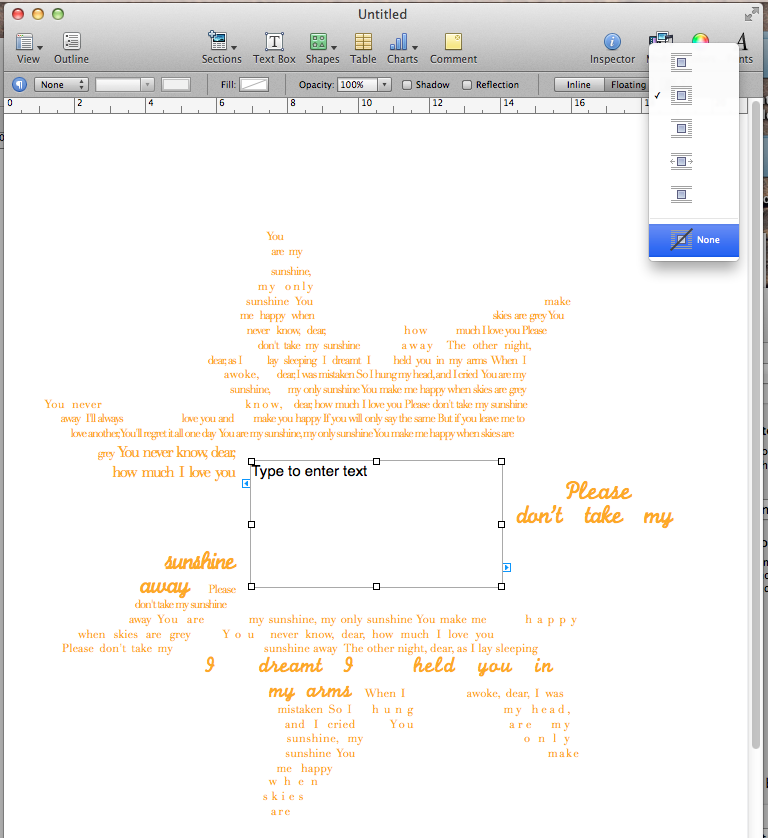
- Back in the document you originally created, double click on the shape and paste the copied text. You might need to paste it a few times to fill the space.

- Click on the outline of the shape and choose no fill as the line colour.
- Click on the inspector and go to text. Justify the margins. You can also alter the character ligature and line spacing here.

- You may like to change the font. If you don’t like the options available, download a font you like. There are some great font resources on the web, I like fontspace the best. You may like to pick out words and phrases that mean a lot to you and change the colour, font, bold or size. To quickly change the size in pages, select the word/s and press control and +.

- To add the name and dates, create a text box. Change the properties to floating. Place this onto the shape and type your names , dates or other messages.

- Edit the font size, colour etc. to your liking.

- Save the document. You may like to export to a PDF for easy printing.


Hi Robyna. Thanks for this, but I’m stopped at step 8. Whenever I paste the text, it appears as a block of text: it doesn’t fit into the shape. What did I miss?
I’m using Pages 5.2
Hi Phil. Ensure that you have selected the shape you have just drawn. You should see little red dots. Double click. This should position the cursor within the shape, rather than outside it. Good Luck!
To anyone confused like I was….On the newer versions of Pages (I’m using 5.6.1) Select your shape, then from the Format menu > shapes and lines > Reset Text and Object Handles.